Hello :)))
Do you have best friends and want to give them a charm of friendship? Did you forget to buy someone a gift, don't have time to buy something, or would rather give them a homemade gift? Well today is your lucky day!
I'm going to teach you how to make paper beads and a paper bead + shell charm. I made one of these for all the random girlies and they loved it ;)
Part 1. Paper Beads
What you need:
 |
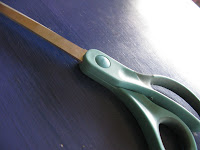
| Scissors |
 |
| Glue |
- Magazines
- Toothpick (or needle)
- Scissors
- Glue
- (Optional) Ruler
- (Optional) Pen
- (Optional) Varnish [Sorry no picture]
How to make it:
2. Choose the shape of bead you want and cut from the magazine. Here are the varieties:
You can choose if you want to cut it freehand or with a ruler and pen.
3. Start rolling the shape you cut out around the toothpick or needle, starting at the thick side. Put glue along the middle of the shape to keep the bead in place.
4. Put varnish or excess glue around the bead to make it last long and add glaze. Leave it to dry for a day or 2.
5. Repeat to make as many beads as you want.
6. Slide the beads of the toothpicks/needles.
Part 2. Paper bead + shell charm.
What you need:
 |
| Shells |
 |
| Glue Gun |
 |
| String |
How to make it:
1. Plug in the glue gun and let it heat a bit. In order for it to last longer and so you have time to stick it together, the glue should be hot.
2. Glue one side of the bead and place the pointy side of the shell there. To make it last even longer, glue around where the bead meets the shell.
3. Measure how long you want the string(make sure there is enough room to double knot it as well) and cut it.
4. Glue the other side of the bead, fold the string in half, and place the rounded side of the string inside the bead. To make it last longer, glue around where the string meets the bead.
5. Double knot the string.
6. Repeat for all the beads.
Voila! You've just made a paper bead + shell charm!
Here is how it look when finished.
Thank you for reading :)
Love, Hannah...<3
Join our contest!
Have any questions, suggestions or comments? Tell us, we'd love to hear what you have to say :)
Like this blog? Subscribe.
Love it? Share.
Not ready to subscribe? Come back tomorrow, maybe we'll change your mind. ;D


12 comments:
really cute xx
ruedevogue.blogspot.com
Thats a great DIY!:)
Take a peek at my blog:)
Shubhi's Revels!
Thank you both :))
I'll be sure to check out your blogs :D
Love, Hannah...<3
They;re so cool!
love them <3
thank you for passing through my blog!
i followed you :D
Enter My Blog Competition!
xoxo
Chloe Polo
Fasheauty
Interesting idea :)
Thanks for your lovely comment,I follow you back Hannah
Kisses!
http://minnieonfashion.blogspot.com/
Its comments like yours that make blogging worthwhile:)
Love your blog too, keep up the good work!
kisses:*
Shubhi's Revels!
Great DIY !!
x
great!
<3
Hi girl!
Thans for leaving such a sweet comment on my blog. It made me so happy.
I like your blog and I'm following you back now.
XO
www.fashionlalalove.blogspot.com
Ill be trying this out tomorrow(:
Hi, my name is Katie I am a new follower of your blog via GFC. I would love it if you could stop by sometime(: Can’t wait to see more of your posts!
http://riceballinc.blogspot.com/
Thank you all SO much! We really appreciate comments and love reading every single one ;) <3
What a great project. Those are so cute! Thanks for sharing. Your blog is lovely =)
xoxo,
Suzie Q
www.StyleCueBySuzieQ.com
Post a Comment